

I didn’t make gnocchi with my Grandma until I was 22 years old, despite being surrounded by her Italian culture and traditions since I was born. It was one of those experiences we unfortunately never made time for; either school, sports, or childhood activities got in the way, filling up my sisters’ and my own schedule every weekend. There are always moments like these that are regrettable, but in the same thought though, I feel truly blessed to have finally had this cooking experience with her, even though it was much delayed.
Although my Grandma enjoyed cooking and had her share of family recipes, I wouldn’t say she was the typical Italian Grandmother in the kitchen, the cooking guru who cooked day in and day out, teaching the rest of the family these important skills. I actually learned most of what I know about cooking from my dad; a bit of a break away from the tradition of the Italian mother or grandmother being the family cook. My dad fulfilled this role instead, passing on the necessary skills to prepare Italian cuisine to my sisters and I. What my Grandma contributed though was the culture, the language, and the tradition behind the cooking. A significant aspect that could only be taught by someone from the older generation, who lived the first generation experience in America, directly learning all she knew about Italian culture from her immigrant parents.
This is what made the day my sister and I made gnocchi with my Grandma so special. Not only did we learn how to make gnocchi, we learned the tradition behind the process from the way you knead your dough with your hands, to dropping the egg into the middle of the flour, to the use of the fork and rolling the gnocchi down the fork, “giù,” to create the authentic indents in each gnocchi piece. As the four year anniversary of her death recently passed, I dedicate this July post to her and to our once in a lifetime experience of making gnocchi with our Italian grandmother.
Now, we begin! This recipe will feed a family of 5. (Gnocchi is very filling; servings are not as large as other types of pasta)
Tools you will need: Flat workspace (pastry mat works well, cloth or silicone), potato masher, knife, table fork, baking sheet, large pot

Ingredients:
2 pounds brown russet potatoes
Pinch of salt
2 cups all purpose flour (*this is not exact; may need another 1/4-1/2 cup if dough is still sticky)
1 egg
1. You will begin the process by boiling the potatoes. To prep the potatoes for boiling, wash, peel, and cut the potatoes into halves. Place the potato halves into a bowl of cold water, and let the potatoes sit and soak for 30 mins. This is a trick I learned to ridden the potatoes of some of their starch. As you are waiting, fill up a large pot with water, a pinch of salt, and bring to a boil. Drain the potatoes out of the bowl of cold water, and add them to the pot with the boiling water. Cook potatoes until tender. Test tenderness by sticking a fork through a potato piece; the fork should easily slip into the potato. The potato should not break apart though and that would be a sign they are too soft and overcooked. Drain potatoes into a strainer and let cool for a few minutes.
2. Move to your work surface: place about half of your flour (1 cup) on the surface. Then directly on top of the flour, take your potato masher, place one potato half at a time in the masher, and squeeze out over the flour. Repeat this until all the potatoes have been mashed. Add the rest of the flour (1 more cup) on top of the mashed potatoes, and mix the heap of flour and potatoes with your hands. Mix just until ingredients are combined. (In the photo below, the potatoes are being mashed into a bowl first, and then transferred to the flat mat. This is not necessary; they can be mashed right onto the flour.)


3. Make an indent or small hole in the middle of the mixture with your hand. Drop the egg into the indent, and slowly mix egg into flour and potato mixture. It is crucial you make an indent to add the egg. Otherwise it just slips off the top of the mixture and runs all over your work space. This part can be a bit messy! Knead with hands until dough is no longer sticky. Test by poking with your finger- the dough should not stick to your finger. This is where you can add a little extra flour if the dough just won’t loose it’s stickiness. Be careful to not over knead; stop as soon as the dough is not sticky. I find it helpful to wash my hands at this point as there’s usually dough all in-between your fingers. This will make it easier to handle the dough in the next step.


4. Clean or wipe your workspace, or move to a new one if you have the option. Lightly flour the workspace. Divide the dough evenly into four parts. Working with one part at a time, roll out a part with your hands into a log about 3/4in-1in in diameter. Apply pressure evenly with your hands, and roll by moving hands from center towards the roll’s ends. Repeat this until the log has lengthened and about the diameter mentioned above. Log should be even from one end to the other.

5. Take a knife and cut the log into approx. 3/4in long pieces.

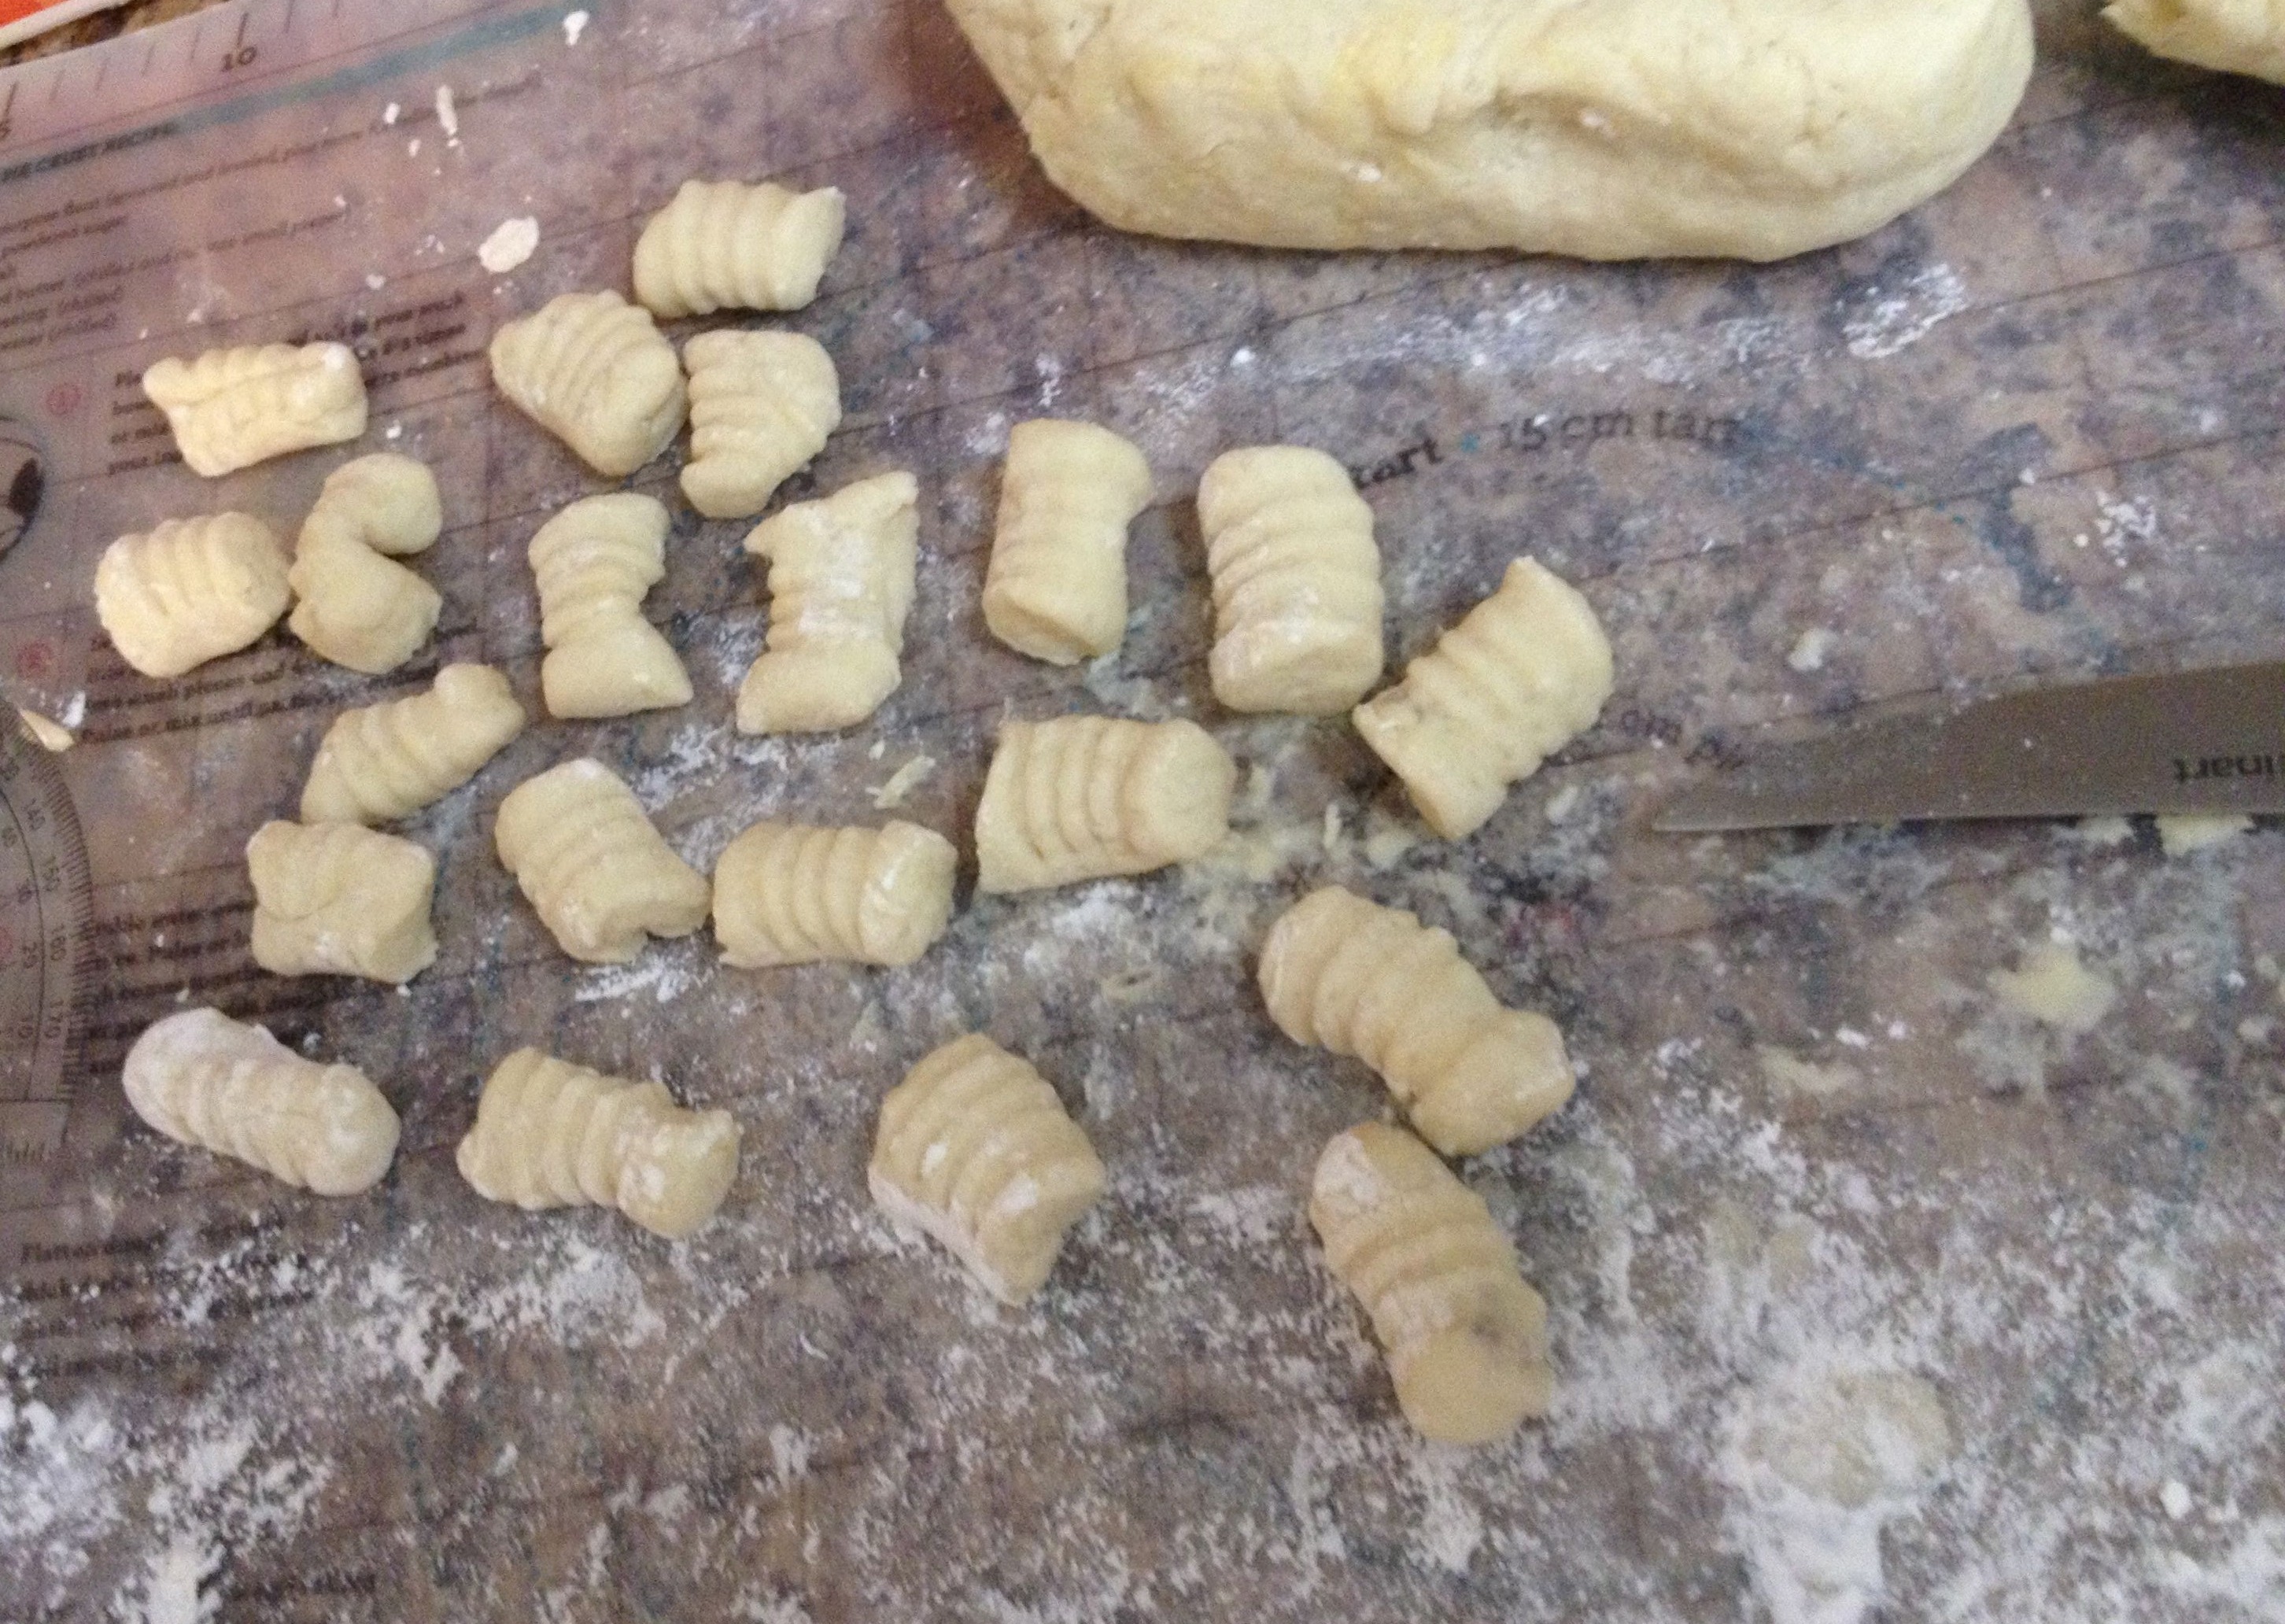
6. Now it’s time for “giù!” As my Grandma and her mother did, the traditional way to shape each piece of gnocchi is to push each piece down the ridges of a table fork. As my Grandma taught us this motion she would say “giù, down the fork!” as giù in Italian means down or downwards. This is a tricky motion that takes some practice; I squished enough gnocchi pieces in my experience by applying too much pressure. Be light with your hands and find a consistent pressure and motion. Here we go-
Hold your fork in one hand and lean the bottom of the prongs against your work surface. Take one of the 3/4in pieces of dough and place at the top of the fork’s prongs, holding it with your thumb. Then with your thumb, press lightly and roll the piece of dough downwards to the bottom of the fork’s prongs. The piece of dough should roll as it’s moving and when finished is covering your thumb. And that is how gnocchi pieces have lines on one side and an indent (from your thumb) on the other side! Cool huh? There are lots of tools and makers available these days to assist you, but I think it’s much more rewarding to do all this by hand, knowing your hands created the design and shape of each individual gnocchi piece.


Repeat the motion of rolling the dough pieces down the fork until you finish the roll you cut up. When finished repeat steps 5 and 6 for each dough part, until all dough has been made into gnocchi pieces. After 100 or so giù motions down the fork, you will be an expert! 😉
7. Line up the gnocchi pieces as you work on a baking sheet; there will be many pieces and you may need more than one sheet. Do not stack the pieces as they will stick and their forms will be ruined. If you want to freeze the gnocchi and save for later cooking, place gnocchi is large, flat container with lid, keeping the gnocchi in flat layers, dividing each layer with wax paper. This has worked very well for me in keeping the gnocchi separated.

8. If you want to cook immediately, boil a pot of water with a pinch of salt. Add gnocchi pieces to the boiling water. They only take a few minutes to cook so don’t walk away! As soon as the gnocchi rises to the top of the water and floats on the surface, they are done. Using a slotted spoon, remove the gnocchi from the water and place into a large bowl. Do not drain water as it will take many batches to finish boiling the gnocchi; you do not want to boil them all at once and crowd the pot. As you are working on the batches, add a little olive oil or butter to the already cooked gnocchi in the bowl to keep them from sticking.

Cover with your favorite sauce, and your gnocchi is ready to eat! Sauces for gnocchi can range from simple, like butter and sage, or olive oil and herbs, to more complex, such as a red tomato sauce or Italian cheese sauce (usually a mix of Italian cheeses and referred to as “quattro formaggio.”) I will cover some sauce recipes for pasta in a future post.
You will never look at store bought gnocchi the same way again! Homemade pasta is a truly authentic experience, and I am grateful I have experienced this tradition to be able to pass this on to my own kids one day. Molto grazie Grandma————————♥
If this post has inspired you to try making gnocchi, please post a picture of your own gnocchi making experience below- I would love to hear about it!
Enjoy & mangia!


Italian word of the day:
Cucinare (v) = to cook *(pronunciation: coo-chee-nar-ay)