
If you love olive oil like I do, you probably use it for everything, every day, every meal. It’s a staple that is always present in your kitchen, and if you’re out, then you’ve only got about 24 hours to go buy some before you’re going crazy trying to cook without it. Shopping for and tasting new olive oils of different flavors from various locations around the world is exciting to you like how shoe shopping is exciting for your fashion obsessed friend. Do we agree? If so, keep reading.
The problem is, olive oil can be expensive, especially when they are infused with different flavors. Solution to getting your many varieties of olive oil without breaking the bank? Infuse it yourself! Infusing olive oil is extremely easy, fun, creative, and relatively cheap. It allows you to have multiple flavors of olive oil at your immediate disposal, and allows for some creative mixing and matching of flavors when cooking. If you’re sold, here’s how you’re going to do next weekend’s DIY infusing olive oil project…
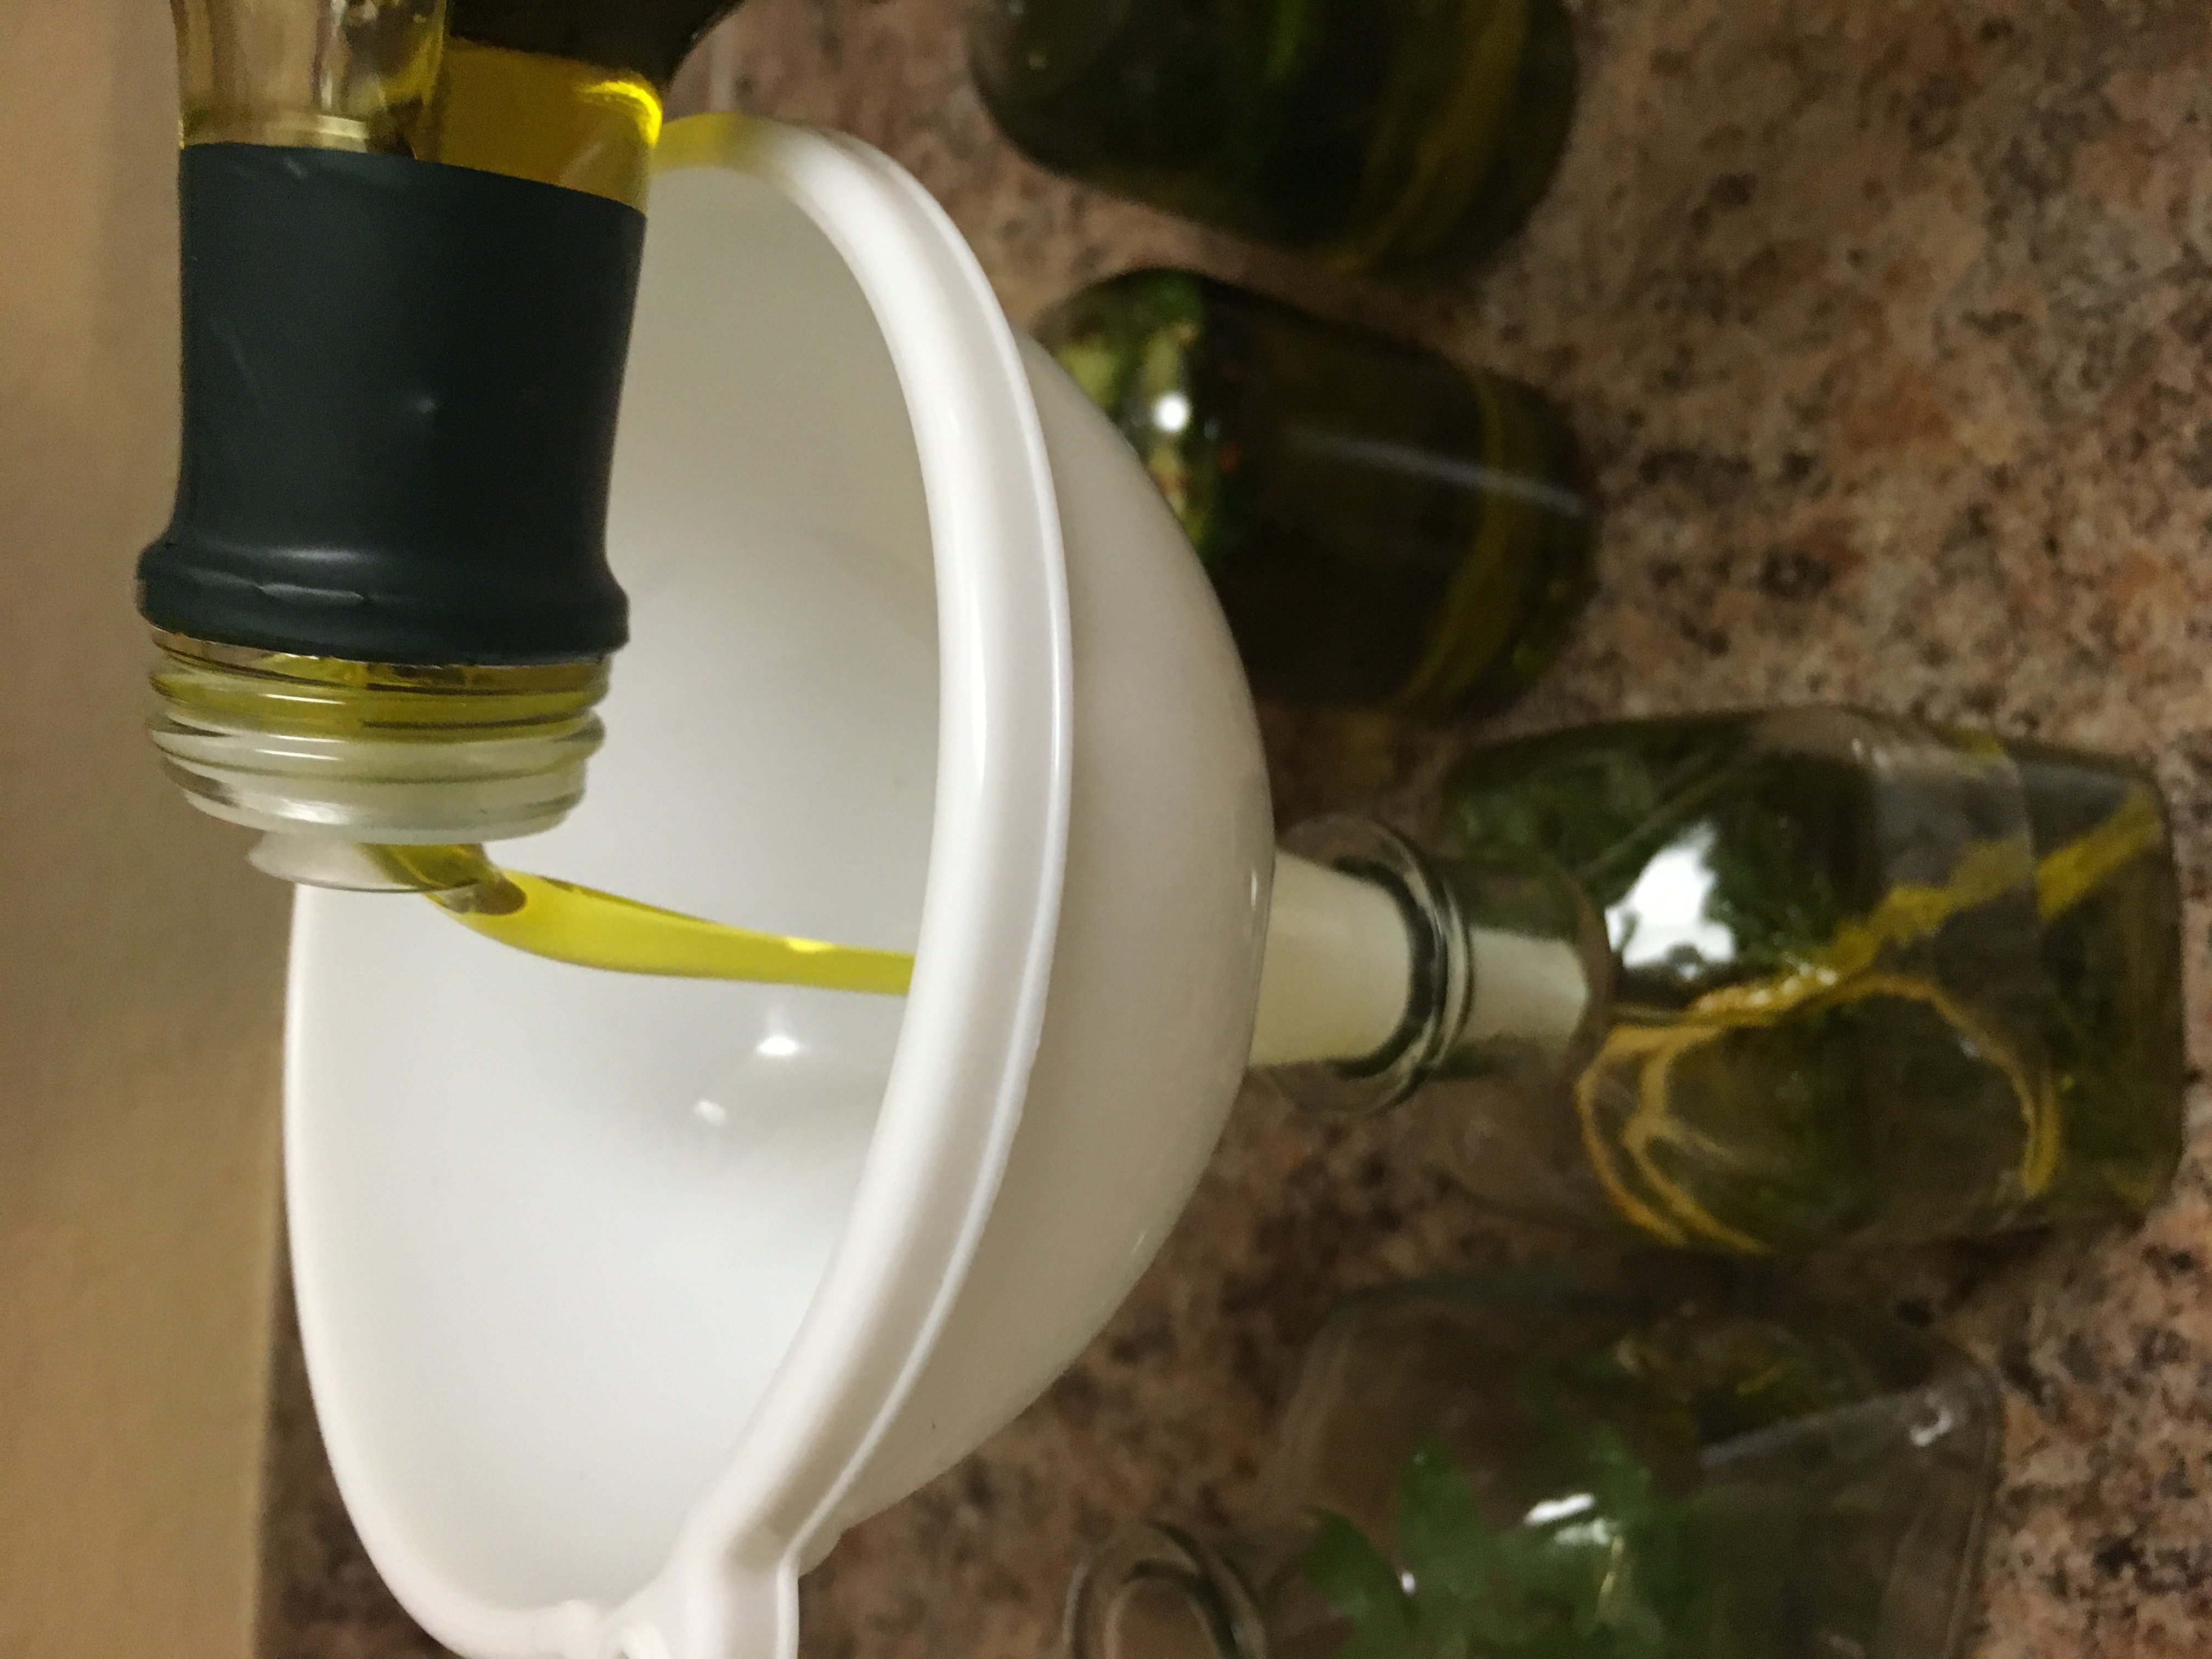
- Find glass bottles. You can simply go buy some glass bottles at your local cooking store, or you can get creative. Find bottles with unique shapes and designs, often for real cheap, at Marshalls, TJ Maxx, Homegoods, thrift stores, flea markets, or garage sales. Make sure bottles are glass, and wash well with hot water and soap to make sure no residue is left from the product that was previously inside. Allow the bottles to dry completely before using to prevent bacteria buildup (this is very important!).

- Select olive oil. There’s no rule here, but I personally go for a olive oil of “medium” quality for infusing. I never buy super cheap olive oil because you don’t know where it comes from and whether it’s authentic (yes, there’s actually a major fraud problem with olive oil), but I also don’t like to waste extremely expensive olive oil on infusing. In my opinion, if it’s expensive, the experts have alraedy taken the time to make sure it’s supposed to taste the way it’s supposed to…don’t ruin it! So just go with a decent, middle priced olive oil, $12-20. Determine if you want regular or extra virgin….I personally always use extra virgin, but either works.
- Determine the herbs and spices to add. This is where you get to be creative! If possible, buy organic and/or pick them from your yard. There’s many, many options for herbs and other items to add, but here are the combos I made this time around. I always use an herb, as that is the main provider of flavor, and then sometimes add a spice or additional item that compliments that herb.
- Rosemary and lemon rind
- Oregano and garlic
- Jalepeno and red chili flakes
- Mint
- Other options: thyme, basil, fennel greens, shallots, specialty salts that come in small chunks/flakes.
- Dry the herbs and additional spices/items. It is advised against using fresh herbs as they contain moisture which can harbor bacteria growth, so after washing the herbs, dry them at least overnight or up to a handful of days. This goes the same for the additional items like garlic, jalepenos, lemon rind, and spices. I just dry them on a paper towel on my counter, but I’ve also heard the tip to use a dehydrator if you have one (putting on my future to do list!). *Just note that you’ll have to use the olive oil in a much quicker period of time if you add additional items with the herbs because they retain much more moisture and will be harder to dry out.
- Arrange herbs and additional items in the bottles. Gently push items into each bottle. Don’t allow herbs to stick out of the top where they won’t get covered by oil.

- Add oilve oil to bottles. I would suggest using a funnel to avoid spills and dripping. Slowly pour olive oil into each bottle. Make sure the oil completely covers the herbs.


- Add caps. Personally, I like the rustic look, so I add used wine corks to the tops of my bottles. I also need to find ways to reuse my hundreds of collected wine corks that I’ve convinced myself I need (but see, I do need them!). You can also use olive oil pourer tops in anticipation for later use (easier to manage pouring volume).

- Get cookin’! I don’t follow a rule about how long to wait before using the olive oil, but give it at least a few days for the flavors to start combining. Use the oil within a month or so, and remember, that if you added extra items in addition to the herbs, try to use the oil more quickly. Pay attention to the appearance of the herbs and items inside to make sure they look fresh and haven’t started to go bad.


When you finish using your delicious infused oil, remove the contents inside, throw them away (don’t reuse!), wash the bottles, and start the process again!
Enjoy and mangia.
Italian word of the day:
Fare (far-eh) = to make